When deploying advanced satellite internet systems like Starlink in various settings, the choice of mounting hardware is crucial for both signal quality and durability. The J Pole Mount, renowned for its versatility and ease of installation, stands out as a preferred choice for both residential and commercial Starlink installations. This article delves into the specifics of utilizing a J Pole Mount for Starlink systems, highlighting its benefits, installation nuances, and best practices, backed by insights from ‘Starlink Installation Pros.’
Importance of Choosing the Right Mount for Starlink
Starlink, developed by SpaceX, offers high-speed internet connectivity via a constellation of low Earth orbit (LEO) satellites. The system’s efficiency heavily depends on the quality of the satellite dish’s installation, which includes the choice of mount. A well-chosen mount not only supports optimal signal reception by ensuring proper dish alignment but also secures the equipment against environmental challenges like wind and weather.
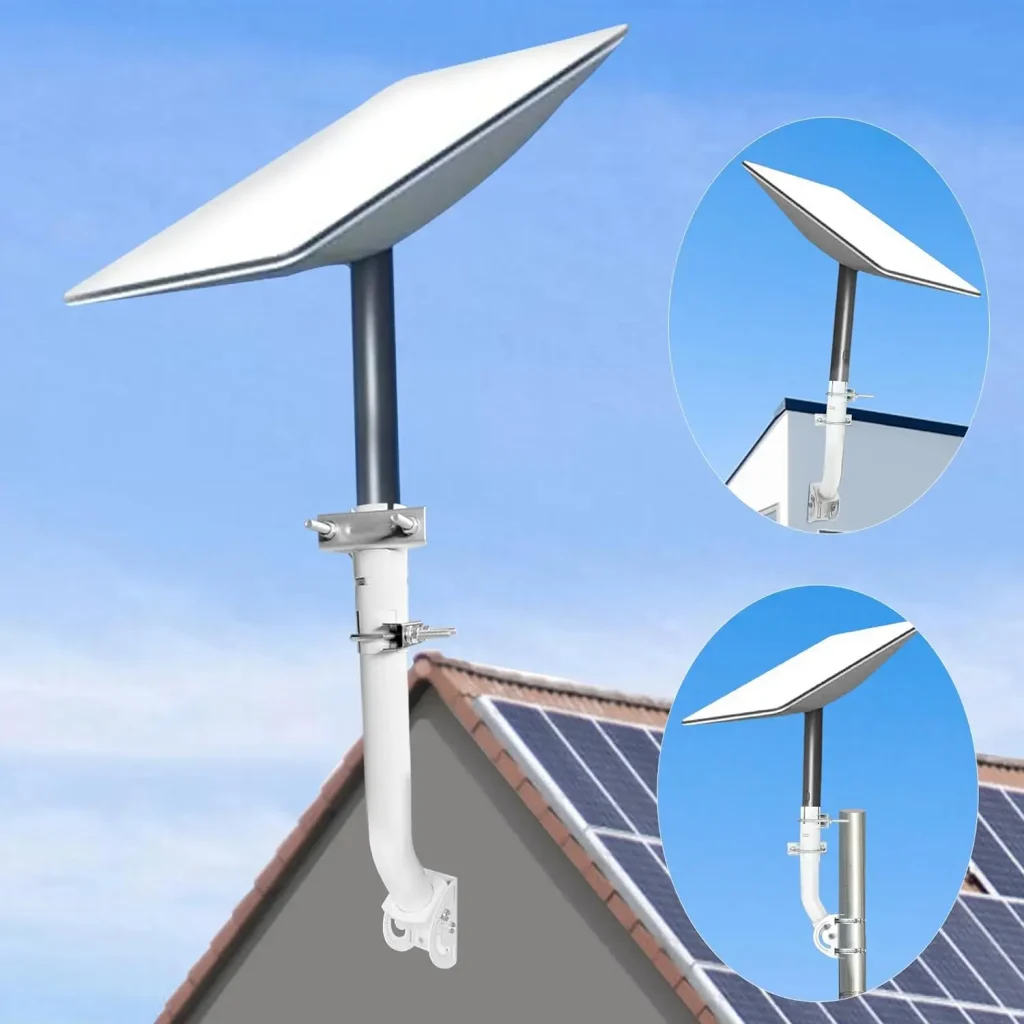
The J Pole Mount Explained
The J Pole Mount is named for its distinctive “J-shaped” profile. This design offers several advantages:
- Elevation and Clearance: It extends the antenna higher than standard mounts, providing more clearance from obstructions such as trees and buildings.
- Versatility: Suitable for installation on various surfaces, including roofs, walls, or even on the ground.
- Durability: Typically made from galvanized steel or aluminum, J Pole Mounts are built to withstand harsh weather conditions, making them ideal for long-term outdoor use.
Installation Process of a J Pole Mount for Starlink
Installing a Starlink dish using a J Pole Mount involves several key steps, which Starlink Installation Pros handle with meticulous attention to detail:
- Site Survey: Determining the optimal location for the mount, ensuring clear line-of-sight towards the sky with minimal obstructions.
- Mounting the J Pole: Securely attaching the mount to a stable surface. This might involve drilling and bolting the mount onto a rooftop or anchoring it in concrete if placed on the ground.
- Aligning the Dish: Attaching the Starlink dish to the mount and adjusting it to the correct angles as specified by SpaceX guidelines to capture the best satellite signals.
- Cabling and Grounding: Properly routing and securing cables, as well as grounding the system to protect against electrical surges and lightning.
Technical and Aesthetic Considerations
The J Pole Mount not only enhances the functional setup of Starlink but also addresses aesthetic concerns. The mount’s design allows for a more discrete placement of the dish, potentially reducing visual impact, especially in residential areas where homeowners prefer a less obtrusive appearance. Moreover, ‘Starlink Installation Pros’ often recommend custom color painting of the mount to blend with the building facade or roofing.
Current Facts and Figures About Starlink Technology
As of the latest updates, Starlink operates thousands of satellites in low Earth orbit, providing broadband speeds comparable to terrestrial internet services in many regions. The technology continuously evolves, with recent developments aimed at reducing satellite visibility and improving bandwidth, demonstrating SpaceX’s commitment to innovation and quality service provision.
Conclusion
The J Pole Mount is a robust solution for Starlink installations, offering both functional and aesthetic benefits. By leveraging such mounting solutions, users can maximize their investment in cutting-edge satellite internet technology, ensuring reliable and high-speed connectivity.
FAQs
- What makes the J Pole Mount suitable for residential Starlink installations?
Its ability to elevate the dish for better line-of-sight and its discrete appearance makes it ideal for home environments. - Can the J Pole Mount withstand extreme weather conditions?
Yes, made from durable materials like galvanized steel, it is designed to endure severe weather, ensuring the longevity of your installation. - Is professional installation necessary for a J Pole Mount?
While it is possible for DIY enthusiasts to install it, professional installation by ‘Starlink Installation Pros’ is recommended for optimal setup and safety. - How does the J Pole Mount impact the signal quality of Starlink?
By providing elevation and clearance from obstructions, it helps in maintaining a clear line-of-sight to satellites, which is crucial for signal quality. - Where can the J Pole Mount be installed other than on roofs?
It can also be installed on walls or secured directly into the ground, offering flexibility based on site-specific needs.